Gallery Instructions | Final
Materials should include:
Cork board with pins
3 pairs of ears
2 hats
3 t-shirts
Projector (necessary cords for projector)
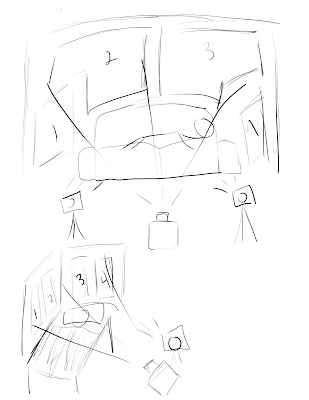
Once all materials are accounted for, first thing you'll want to do is to take the cork pin board and prop it up against the wall so that the pins are facing upright. Next, you'll want to find the 3 clear push pins that are stuck into the cork board. You're going to take the ears and place them on the push pins so that they are hanging. From left to right, it will be the all white pair, the shiny silver pair, and then the white pair with the purple bow. After that, look for the white hat and hang it off the right corner of the cork board, then find the blue hat and hang it off the left corner of the cork board. Finally, there will be an assortment of t-shirts (3), fold them up by putting in the sleeves of the shirts first, then folding the shirts in half, and then half again, laying them in front of the cork board.
Since the installation is mainly on the floor, the projector should be just fine to be set up on the floor in front of it. Approximately ______ feet in front of the installation is where the projector should be placed. After plugging it in to the outlet and then taking the other end plugging it into the projector itself. To turn it on, press the power button and give it a few seconds to get turned on. Then you're going to take the HDMI cable and plug it into the laptop that you are using and the other end into the projector. The laptop will contain a folder titled "463 Final" on the desktop. Open the folder and find the MadMapper file named "FinalDisney" and open it. MadMapper will automatically open with the correct video file. Where you see the tab labeled "Output" there will be a "Full-Screen Mode" option, click that; it will then begin to project the video onto the installation. The setup is complete at this point.
At the end of each day, power off the projector first, hit command T on the laptop, and then power of the laptop. You will have to turn everything back on and off the same way you did the first time each day.


Comments
Post a Comment